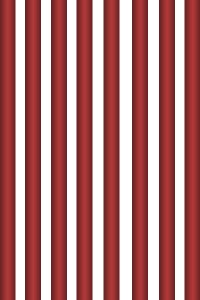
 Have you ever longed to be a star, but had no stage?
No worries. With a simple bit of Photoshop creativity, you can be the star of your own show anytime you like.
Or, maybe you’d like to earn some extra coin by putting your clients on stage?
Perhaps it would interest you to know that one enterprising photographer, Amy Renfrey, has made quite a bit of money from just this kind of image. She took a photo of a simple, red stage curtain while waiting for a show to begin and posted it on a micro-stock photo website. It’s one of her best selling images!
But you don’t have to buy one, when it’s so easy to make!
Let’s begin…
For the example image here, I used a 4×6 image size. You can use any size you like, you’ll only have to adjust the size of your first stripe to scale. You’ll see what I mean in just a minute.
 Step 1: Open a new Photoshop file and make it 4in wide by 6in high.
Step 2: Using the paint bucket, fill this layer with your curtain color. For this example I used #b03939
_________________________________________
***You Can Click on Any Thumbnail in This Series to Have a Better Look***
_____________________________________________________
 Step 3: On your newly colored layer, use the Rectangular Marquee tool to draw out a rectangle of approx. 1/4 x 6.
Step 4: Go to LAYER>NEW>LAYER VIA COPY
Step 5: Turn OFF your Base, full color layer so you have only 1 stripe showing, like the example at left.
 Step 6: Right-Click on your stripe layer, then select Blending Options. Choose GRADIENT OVERLAY.
Your setting should be: BLEND MODE: MULTIPLY, OPACITY:45, check GRADIENT REVERSE, STYLE: REFLECTED, ANGLE:180, SCALE:117, check ALIGN w/LAYER
Step 7: Add a NEW, blank layer just above this stripe layer
Step 8: simultaneously hold down these 4 keys: Ctrl>Alt>Shift>E You should now see your strip, alone on this new layer without the blend mode attached and you can then delete the layer below containing the blend mode. We no longer need that.
Step 9: We’re going to make 7 copies of this stripe now. Simultaneously hold down the 2 keys Ctrl>J to duplicate the strip. Do this 7 more times until you have stacked up 8 layers of strips. ( You’ll still only see one stripe on your image, but in our next step we’ll move the layers to show all 8 stripes).
 Step 10: Select the move arrow from your tool bar and starting with your top layer, drag (move) that stripe to the far right side. Move down to your next lower layer and move that right to create a stripe next to the previous stripe. Try to get the spacing equal, but don’t stress over it. You can adjust it later and it actually creates a more realistic look if they are not all perfect. Continue moving each layer this way until it looks like the sample here.
Step 11: Once you have your 8 stripes arranged where you want them, select your top most layer. From here we are going to merge (combine) all these individual stripes onto one layer. To do this, starting from the top layer, hold down the two keys: Ctrl>E. Repeat this until all the stripes are on one layer.
Step 12: Duplicate this combined strip layer by pressing Ctrl-J
 Step 13: Using the Move tool, move your top layer of stripes to the right until it fills in the gaps. Now it’s really starting to look like a curtain. Add some SHADOW blend mode if desired.
Step 14: These last few steps will help make your curtain look more realistic by adding effects and filters. The first is to blur the curtain to create a shallow depth-of-field effect. Go to FILTER>BLUR>GAUSSIAN BLUR (set to 3.5)
 Step 15: To create a Spot Light effect, go to FILTER>RENDER>LIGHTING EFFECTS>OMNI Play around with the size and setting sliders to get the look you like and to position the light where you want it.
Step 16: Add your favorite character to a layer on top and adjust the size to become an instant celebrity!
But wait…there’s more!
 Step 17: The great thing about this curtain is that you can easily change the color by inserting a color adjustment layer between the curtain layer and your star’s photo. To do this, select your curtain layer, then LAYER>NEW ADJUSTMENT LAYER>HUE/SATURATION. Now, simply by sliding the hue adjustment, you can get all sorts of curtain colors! Fine tune with the saturation slider.
You can play around with lighting and shading techniques to get the final look you like.
That’s pretty easy right!
Now, you and your clients can be the star of the stage…without ever setting foot into a theater!


